
As discussed here and alluded to here, we finally decided to do something about our inadequate water storage. Fifteen gallons just won’t cut it for four people and three pets in any serious situation. I’d been looking into various options for some time, but finally decided to pull the trigger and get something.
I looked at large-capacity storage tanks (ie. 50 gallons + in a single big container). I looked at small-capacity storage. I discussed the merits of Water Bricks with my brother, who has been using them for a while for their storage. And over time I came to some conclusions. When we got water storage containers, they had to be:
- 5 gallons or less so they can be carried easily to wherever they are to be used
- made to take spigots to make dispensing easier
- made of high density polyetholene (HDPE), and opaque for best storage and durability
- airtight
- inexpensive
I finally settled on Saratoga Farms’ 5 gallon stackable containers. I did consider Water Bricks, as their design allows for taller and more secure stacking, but I’d been warned by my brother that they can leak, and they’re designed to be stored sideways, which only encourages leakage. Perhaps I’ll invite him to do a guest review on his and how they’re performing. Ultimately the biggest deciding factor was price. For the amount of storage we purchased, we would have spent about a third more for the same volume in Water Bricks.
So we ordered them online, only to find they would be shipping from a local company not more than a few miles from our house. We prefer to shop local, but had already discarded that business, as their prices were too high by comparison. I wasn’t sure why they’re so willing to undercut themselves on Amazon, but that’s their business model, I suppose. Since then I’ve found another company selling the same containers on Amazon, also at a lower price, so I guess they needed to be competitive. But why they couldn’t lower their local price accordingly, I don’t know. They offer free shipping on Amazon, so had they sold at a similar price locally I would have saved us some time and them some money.

The order arrived earlier than expected–always a plus. We had another order scheduled to arrive that day, so we thought it was the other order until a few hours later when the expected order arrived. That evening we unpacked the containers and put them in their expected destination until we had time to fill them.
That time was this weekend. My wife and one of my sons helped. I had heard that the containers seal better if washed first, and since they ship with no lids on it was probably safer to at least rinse them. Someone in the comments recommended filling a separate container with warm water and dish soap that you could then pour into the containers to swish around to clean them, as putting dish soap directly into the container itself would cause lots of foam and take a lot longer to rinse out. I may have put too much dish soap in the bucket I filled, but every container created a lot of foam when I started shaking it around. It did rinse out without much trouble, though.
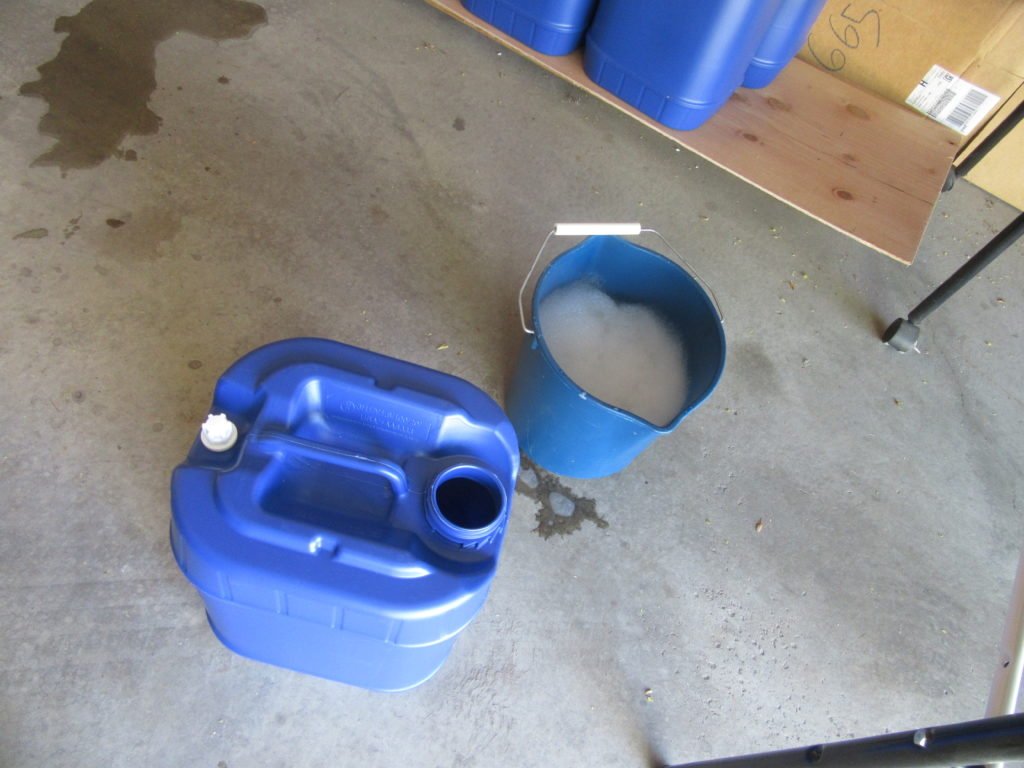
It might not have been the best idea, but for rinsing out the soap before filling I added some water, swished it around again, and then dumped it out on the lawn. My front lawn isn’t the greatest to begin with, though, so it it probably won’t make a difference.
To fill the buckets, I bought a fresh, clean hose just long enough to reach from the faucet to the containers. I intend to use this hose for nothing but filling water containers in order to keep it as clean as possible. Our house is on city water, which is chlorinated. Though the company that makes the containers suggests buying their water purifier solution, all the sites I checked (FEMA, ReadyUtah.org, etc.) all say that chlorinated city water is sufficient and should last at least six months to a year.
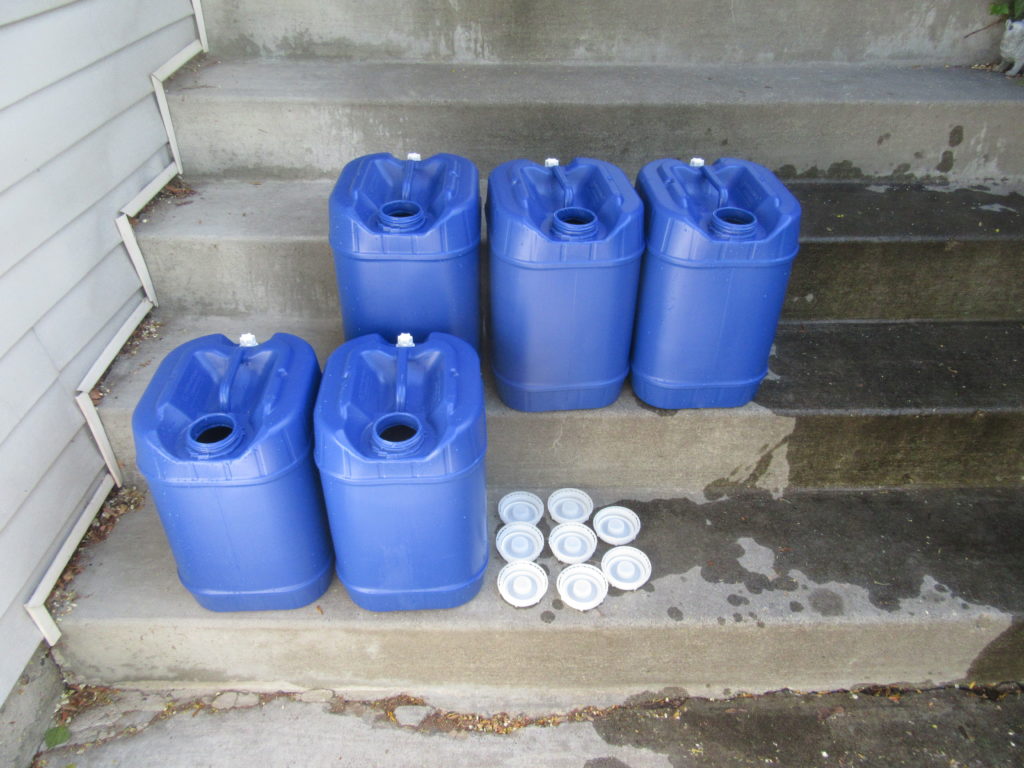
Filling the containers didn’t take as long as I expected. We were able to fill one in a couple of minutes. From there we put on the cap. The caps that came with them have extra bands around the outside that ratchet against the opening on the container to keep the lid on tight. To open the containers you’ll have to tear the band off, similar to the caps on milk jugs.This implies the lids are not intended for reuse, though I can’t imagine there being any problem with it. The containers we already have been using are reusable and have given us no trouble.
Once each jug was capped I tested them to check for leaks. Here we ran into trouble. The very first container I tested dripped from the cap at a pretty steady rate. The second sealed just fine.
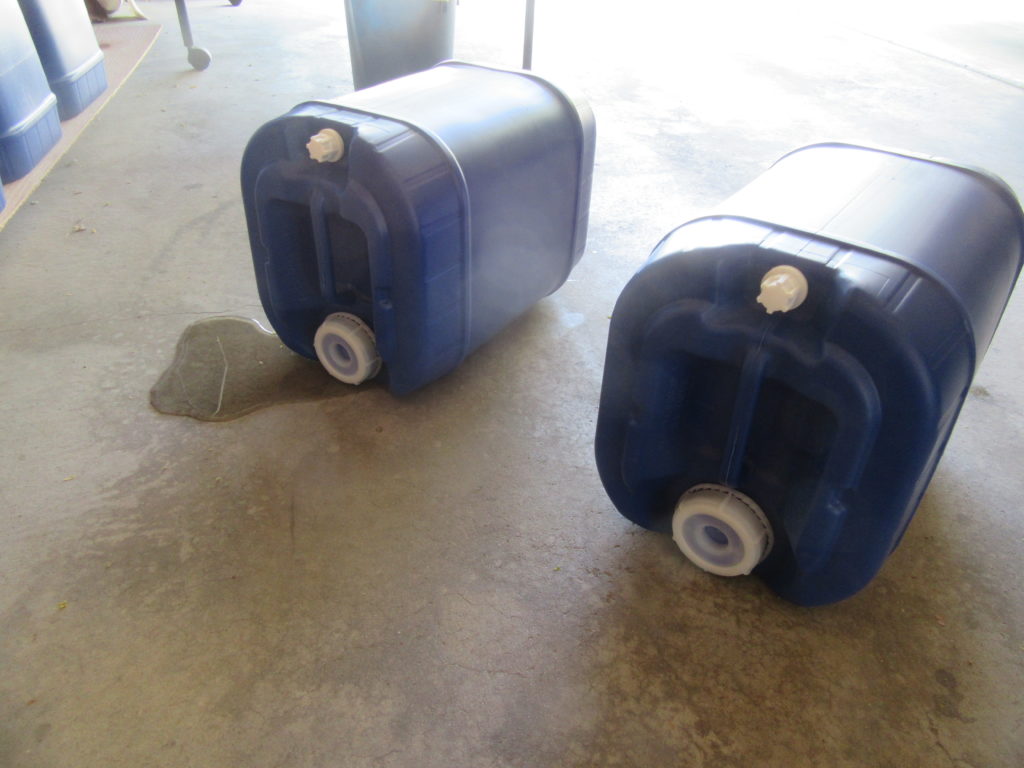
As it turned out, close to half of them leaked. I had read in some of the reviews that the caps had to be really tight before they would seal, but other reviews insisted that you wouldn’t need the wrench they sold as part of a starter kit (which they were out of when I ordered them) and most people could hand-tighten the caps without any trouble. I’m only 135 lbs, and don’t lift, so I guess I don’t qualify for “most people.”
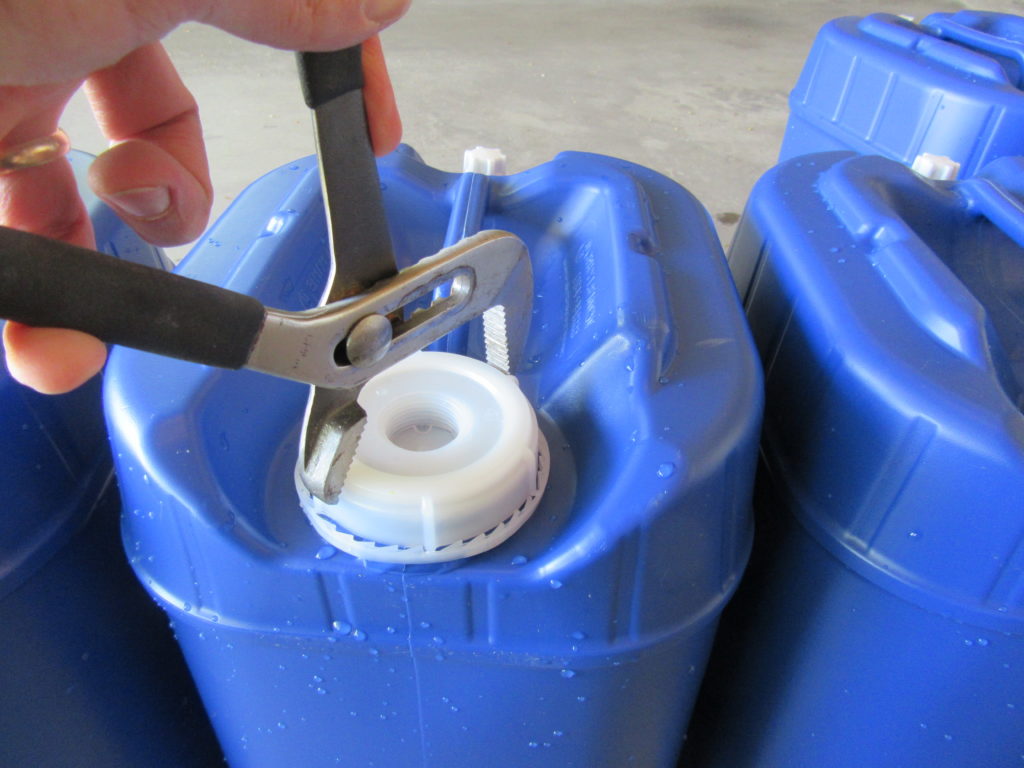
After several attempt to hand-tighten the caps (often I could go back after I’d already tightened the first time and tighten them a little more) I decided to see if by any chance my channel lock pliers would open wide enough to fit the caps. The fit–just barely–and I found I was able to tighten each lid at least another five or six clicks beyond what I could do by hand. That seemed to be tight enough, finally, and I didn’t have any more containers that leaked.
Finally I was able to place the containers in the location I had prepared. I’ve heard from several sources that plastic containers react with concrete floors, leeching chemicals into the water. I’ve also found sources contesting that assertion. In my case I chose not to take chances, plus it’ll keep the containers cleaner if they’re not right on the floor. I laid down some two-by-fours and a section of old wall board on top of that to provide a slight base just wide enough to stack two containers next to one another. The containers are 10″ x 11″, and 14″ tall, and designed to bear the weight of additional containers on top.
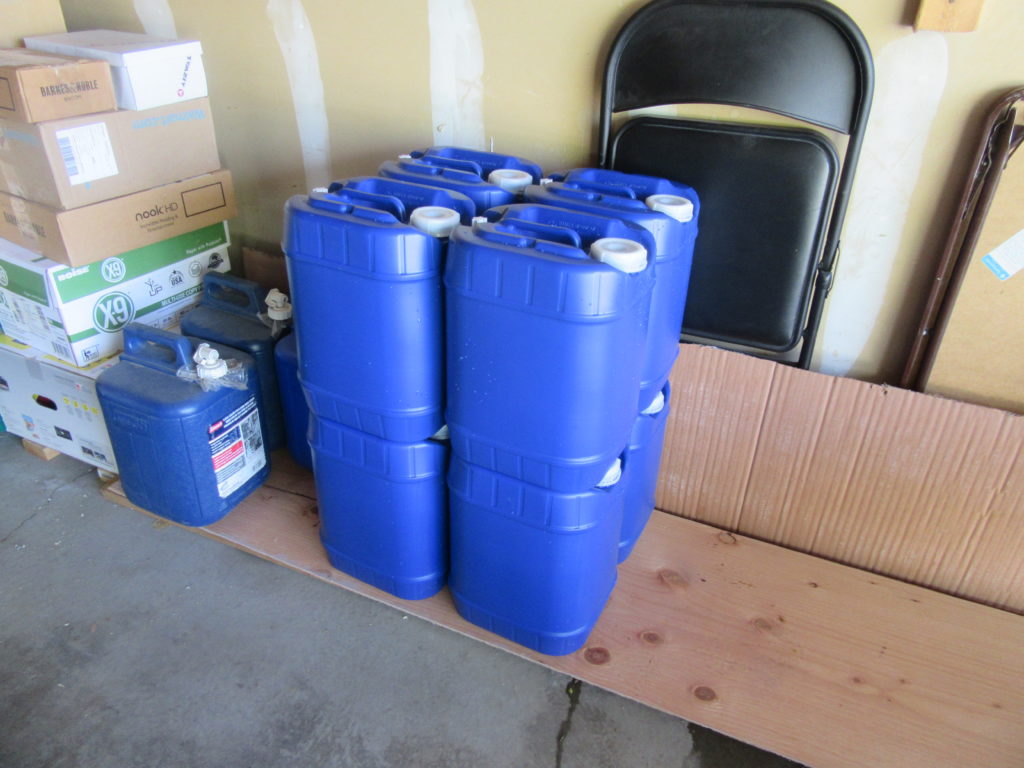
When stacked like this they really to store efficiently. I’m not sure I’d trust the caps enough to store them on their sides, at least not in an area that doesn’t take water leakage well, but upright like this they should be just fine. It’s recommended you store them in a cool, dark place. I’m not sure that’s as critical with the right containers. Sunlight encourages algae growth, and cooler temperatures tend to preserve most things better, but we’ve stored water in the containers on the left in our garage before, and the water was fine for several years at least.
The key is when you go to use the water, check for two things. First, is there anything floating on top the water when you open the cap. That’s bad; the water grew bacteria. Second, smell the water. If it stinks, don’t use it. If it just smells stale it’s fine. The air in water tends to separate out over time, so when you go to use it you might want to add air back in by pouring it into a sealable container and shaking it up, stirring it well, or some other means of aerating it.
The long-term viability of these containers is yet to be seen, of course, but so far I’m satisfied with the investment. The difficulty in getting them to seal was frustrating, but otherwise they function pretty much as advertised. They are a little heavy to lug around, but the handles are comfortable, so getting them from their storage location to our kitchen to use shouldn’t be an issue. Even I’M not that wimpy!
I will test the water quality in about six months, and then a year, and see how it goes. If there’s a problem I’ll write a follow-up review and/or update this post. But I will admit that I feel better knowing we have a good amount of water on hand should we have any more quality issues with the city system or should we get hit with a worse earthquake (though that in itself might reveal some other issues, such as whether the containers are durable enough to handle falling over without rupturing or compromising the seal).
All in all, these containers seem to be a good storage solution at a decent price. Most containers seem to sell for at least $20 – 25 for a 5-gallon unit. With some bulk pricing these came to close to $17.75 or so. It’s a little pricey for something so simple, and there may be cheaper solutions (like the larger barrels or tanks), but over-all I don’t think it’s too much to spend for peace of mind.
UPDATE – May 8, 2020 – I got some more containers from another source that included a wrench. I also got a back-ordered wrench from the first source that I didn’t realize was coming. It’s time for the Battle of the Wrenches!